
…INSTRUCTIONS UNDER REVIEW…


Komebukuro, or “rice bags”, were traditionally used in Japan to carry offerings of rice or beans to temples and shrines for festivals and ceremonies. This bag is inspired by these traditional bags.
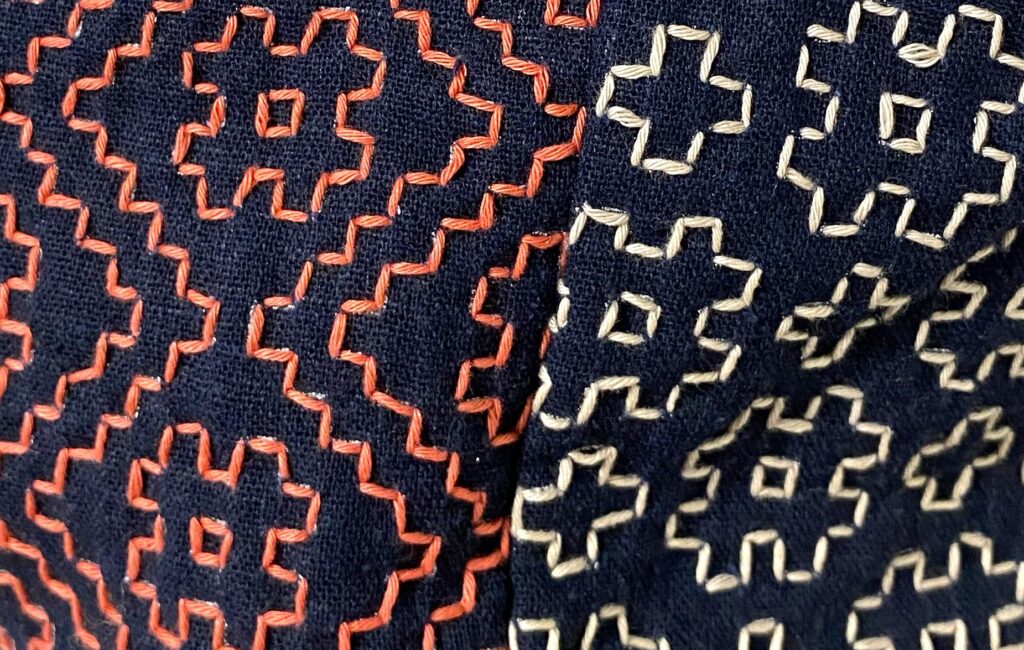
The bag is made out of five panels, the four sides and the bottom. Each side has a different hitomezashi pattern. Below you can see the four panels ready-stitched.

In the kit there are four colours of thread included with this colour variation to be able to personalize it for yourself and create a unique look.
To avoid messy edges and freying you can stitch the edges around before you start stitching the Sashiko patterns. Here are three variations, two with sewing machine and one hand stitched.

Here´s a video to give you a few tips on how to start. I have a few videos available with my other Sashiko kit instructions, you can find them in the menu under Sashiko in the rolldown menu. Happy stitching!
The video below shows how you start a row, you can make a knot at the start of a row. When changing rows leave a small loop on the backside to insure that the thread won´t pull together tha fabric. When pulling the thread through ease it out so it´s not too tight or loose. A good practice is tol ay the fabrics flat, pin down the thread with one of your fingers when pulling the thread and then run your finger across it towards the direction of the needle/loose end of the thread.
After putting a few stitches on the needle run the fabric off the needle, don´t pull the thread with the needle. This helps to keep your work nice and flat and the thread will be nicely sitting on the fabric. See below.
I tie knots when I work with Sashiko as I usually make things that need to withstand the constant usage and handling. You can use regular knots, but if you need to tie two threads together in the middle of a row I suggest you use the traditional joining knot, hatamusubi.
Here are the ready panels, front and back sides. I have stitched two panels with one colour and I chose to combine two colours for the other two panels. You can see on their back sides how I did it.


After I stitched the panels I start to sew them together. The panels are designed with seam allowance and after sewing the panels together the patterns should be alligned/touching each other.


After I have sewn all four panels together, I pin the bottom to them. The panels wrong/back side is facing outwards.


Then I sew it together. I chose to stitch the edges at this point.


When all the five panels are sewn together, I sew the inlining fabric together. It´s done on the same way as the previous panels or it can be done with two panels where one of the panels is as long as all four side panels.
The ears for the string is made out of the ribbon in the kit. You need 8 pieces. I first pin the ears to the outer fabric (with the Sashiko pattern) and then I insert the inner lining.
Here you can see the inner lining already inserted and the ears for the string/ribbon also in place. I usually use a lot of pins while I´m putting the layers and ears together which then I remove half of when things are in place (see secound image below). This helps to stabalize the fabrics while working.


After sewing the edges together, choose a nice string or ribbon to thread it through the loops. It should be around 1 meter long . Cut a bit longer piece, around 1,2 meter and adjust it to your taste/need.
How to thread the string:

